CUSTOM MORTISE AND TENON MAHOGANY CARRIAGE HOUSE GARAGE DOORS
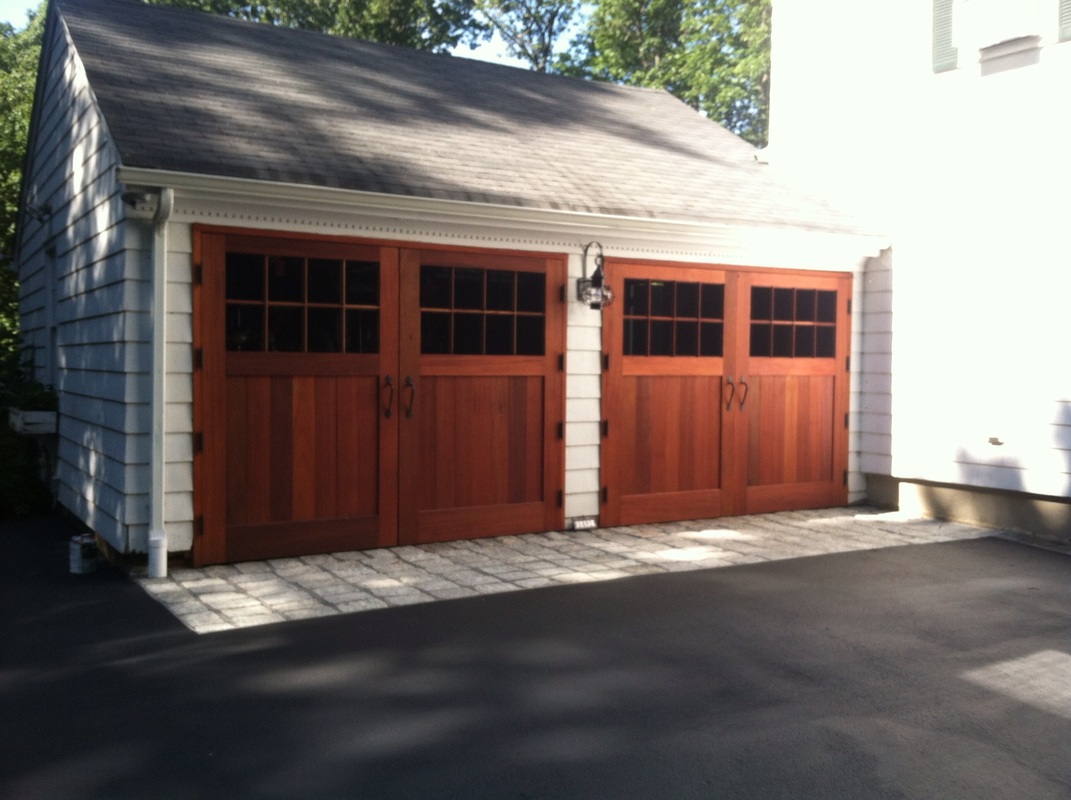
My old garage doors we're falling apart...no surprise. The original owner
had installed 7/8ths pine roll up track garage doors. The panels were made of
partical board which crumbles after getting wet and drying. The joints
were failing and
the paint was peeling. The real problem? The doors weren't made to last. And
worse still? The garage looked horrible. I could do better...my home deserved
better!
So I decided to make my own carriage house garage doors. I settled on pattern grade
African mahogany. Cedar would have been my second choice, pine and/or
oak being last since cedar and mahogany are rot resistant...and combined
with a little careful woodworking design and effort they might just last a
hundred years.
I drew, I sketched, I studied, I read, I asked questions and I thought.
The doors I made were an influence of
observing exterior doors in
New York, The French Quarter in New Orleans, Boston, Madrid and San Francisco
while on trips, reading two books (McKay's Building Construction , by W.B. McKay originally published by Donhead in 1938 and Capentry and Jointery Illustrated by Paul N. Hasluck, originally published by BT&C Books in 1907) which were published in the era in which I was trying to replicate. I also consulting two experts who helped answer quick questions with detailed answers. The sketches of the haunched mortise and tenon joints and weather proof style joints were given to me by one of them.
When I was done I went to Conway Hardwoods in Connecticut and selected enough
8/4" mahogany for the rails and 12/4" mahogany for the styles to allow for a
mistake or two. Then I selected the 4/4" boards for the panels. The styles and
rails were then cross cut to length, jointed on one face and one edge (and
marked accordingly) and planed to their finished thickness ( 1 7/8ths
inches ) using a vintage 1950' MDF 10" Dewalt radial arm saw, a
1940 Crescent 8" Jointer and a 1960 12" Parks Planer. All the stock
was then carefully stacked and stickered ( stacked and spaced with 3/4"
sticks between each board ) to prevent warpage during storage.
What follows is a step by step documentary of what I did to make them.
First Note : These doors would cost $40,000 if custom ordered.
Second Note : They were built and measured to within a thousandth of an inch with a tolerance of about 10 thousanths.
Third Note: They were built to last forever. And there isn't a single screw or nail in the entire project.
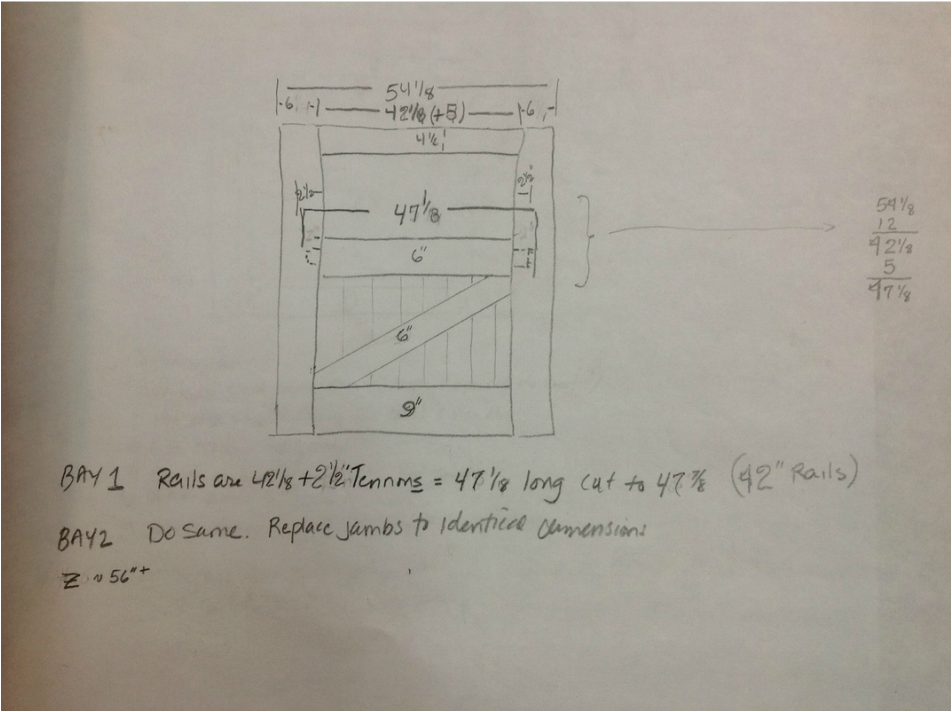
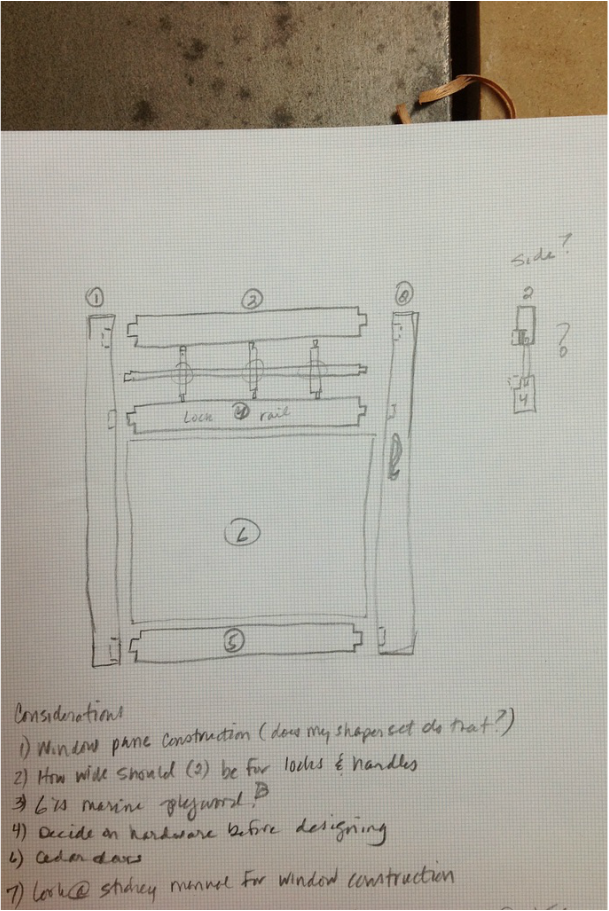
STEP 1: SKETCH
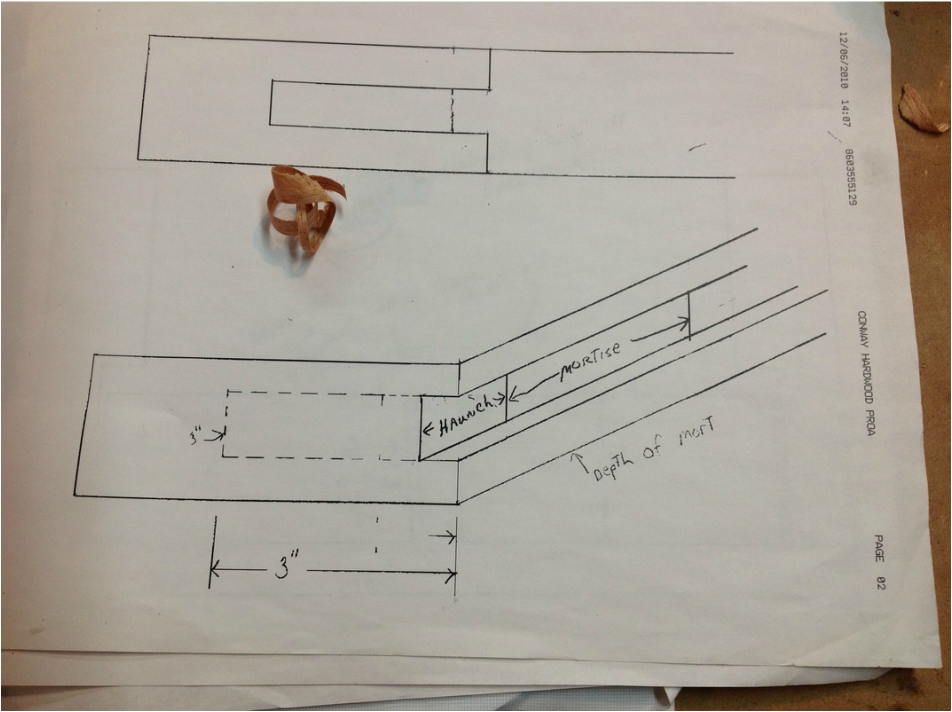
Below are the rough sketches I used as plans for my project. much of it I figured out as I went along, like how big the tenons should be in 1 7/8ths inch stock. I followed the 1/3rd 1/3rd 1/3rd rule. A bigger tenon is not the soundest. My tenons did not exceed 1/3rd the thickness of the stock they were mortised into and contrary to some of the original sketches did not exceed 2 1/4" in depth.
Sketch # 1
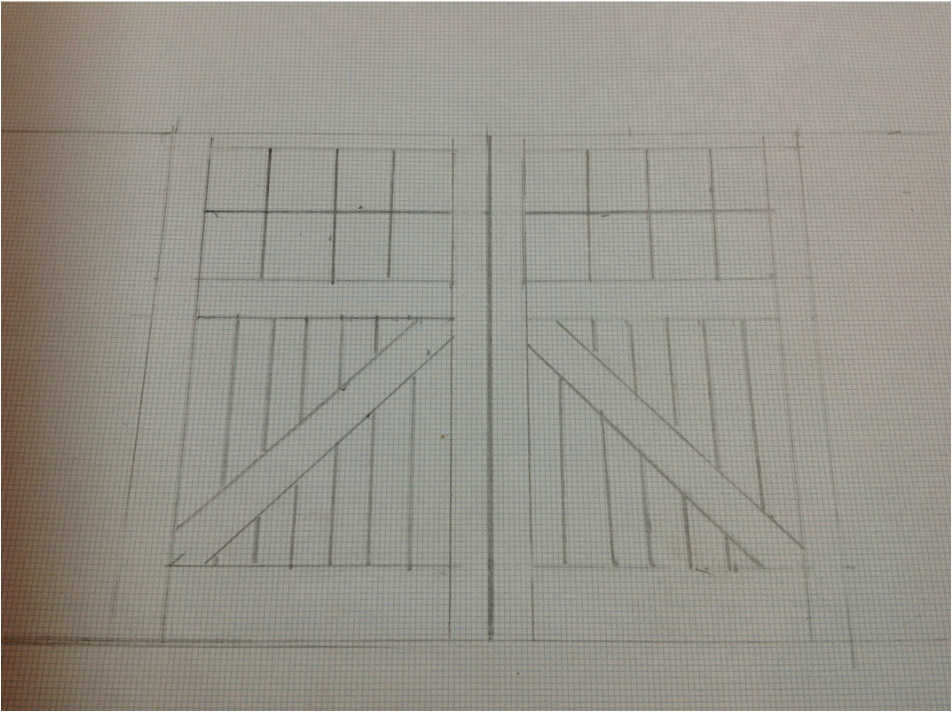
Sketch # 2
Sketch # 3
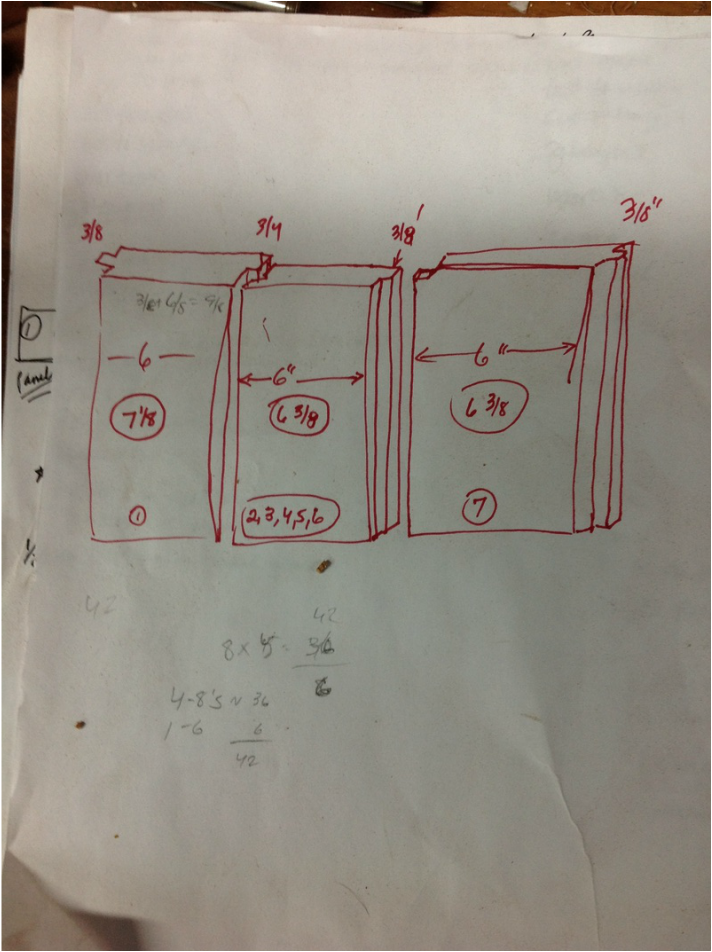
Sketch # 4 Panel deminsions. Each panel is 6" wide on the face. The circled number is the gross width to include the tenon, ship lap etc depending on the panel position. The ship lap is a 3/8ths as are the tenons for the styles. The numbers on the bottom of the each panel refers to the panel position in the door. There are 7 panels in my doors. Note the left panel has a 3/4 shiplap, the others are 3/8ths". I did that in case I needed the extra 3/8th for any final fitting adjustments or errors after all the panels were set.
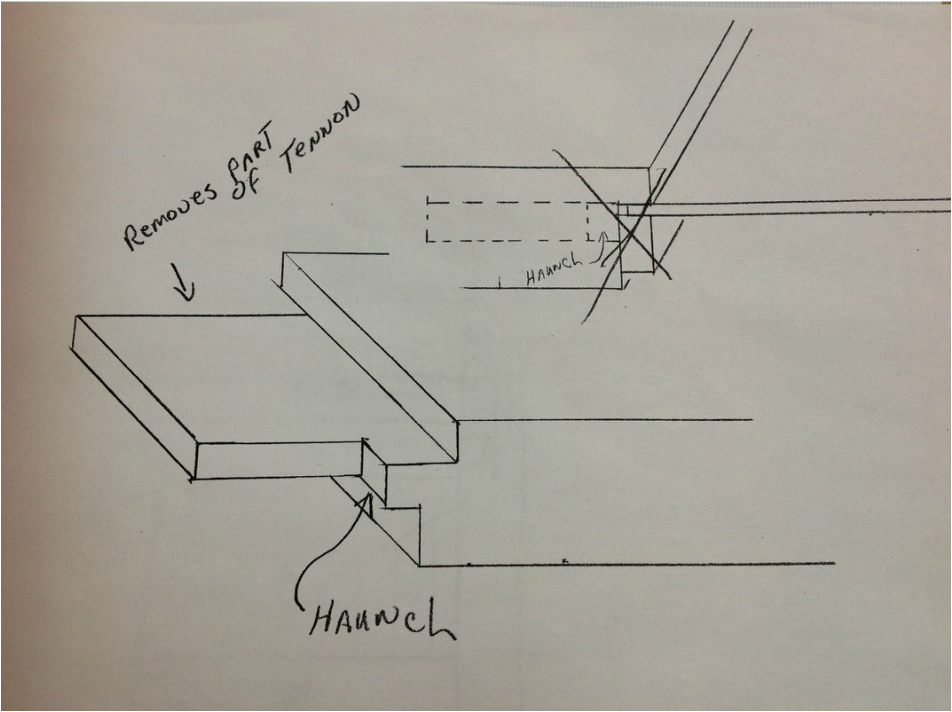
Sketch # 5 The Rails : Haunched Tenon Diagram
Sketch # 6 Weatherproof joint at foot of panet where it sits on bottom rail.
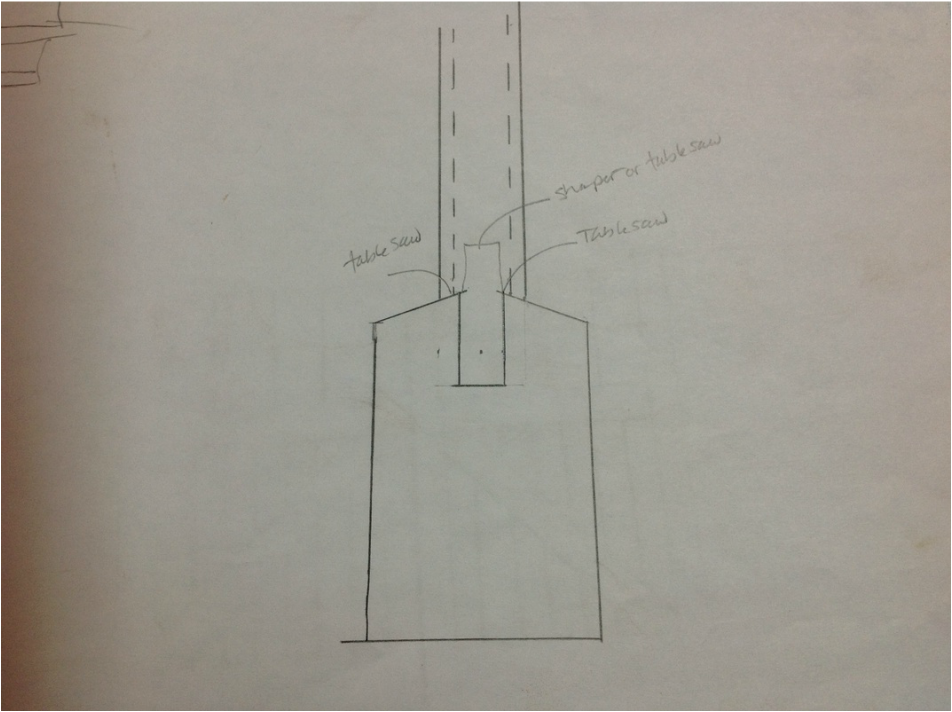
Sketch # 7 The Styles showing mortise and rail haunch rabbet
STEP 2: TUNE YOUR MACHINES
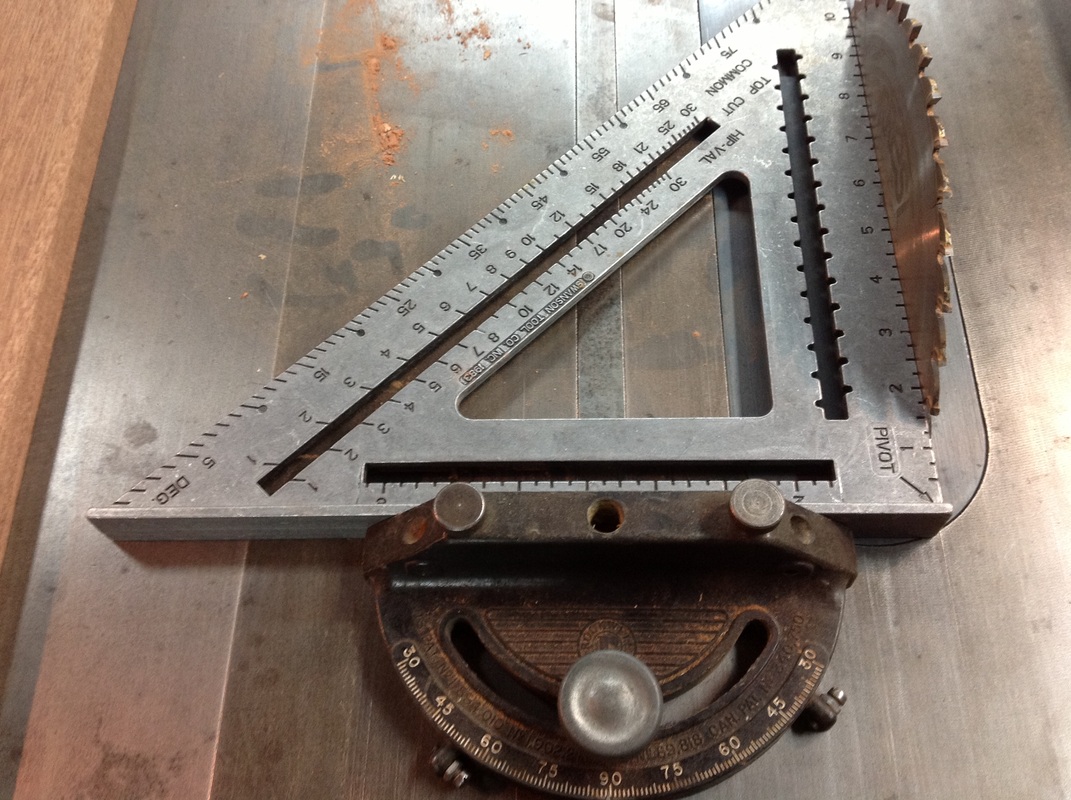
I call this Square 1. If your table saw and fence aren't square your work wont be either.
Don't cut a thing until you've tuned all your machines.

|
|

|

|
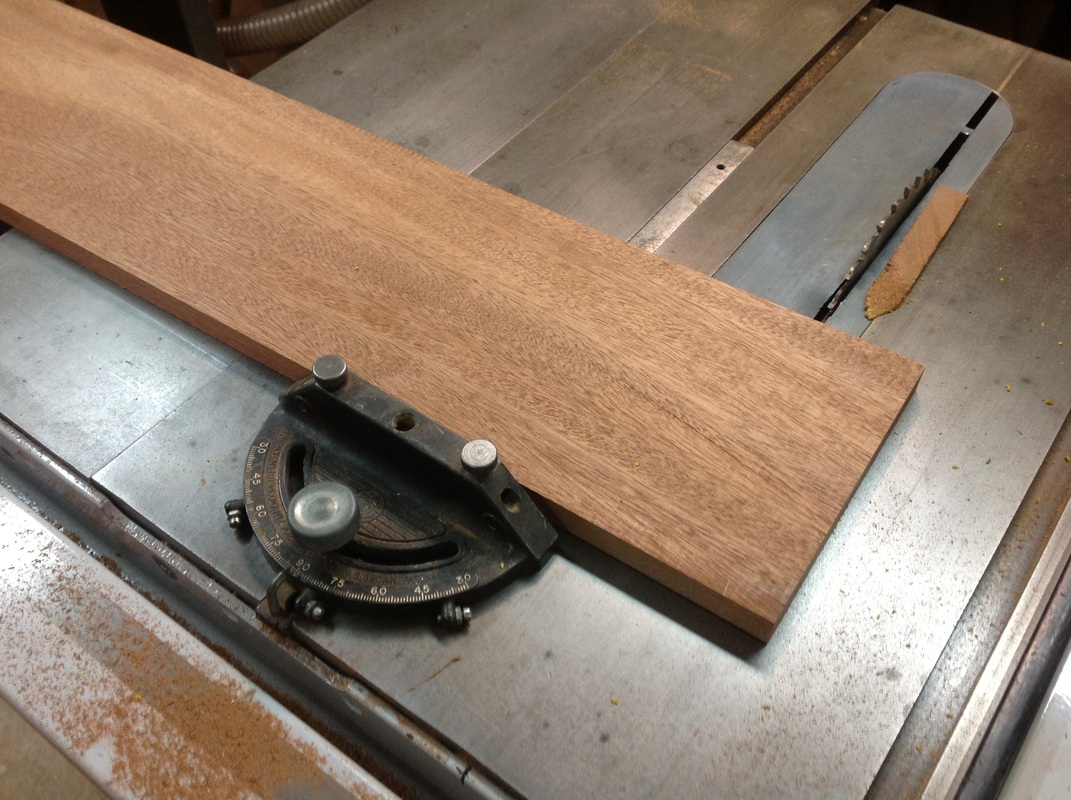
STEP 3: STYLE AND RAIL SET UPS
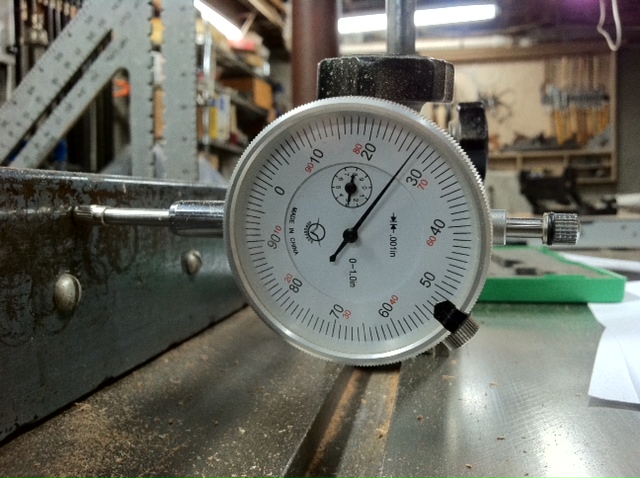
Here I first set up for a 3/8ths groove and haunch centered on 1 7/8ths stock for the styles and rails. I used a dial guage on the backside of my table saw fence for precise cuts. This cut will be the for the style groove and the rail haunch. The styles and rail are also mortised and tenoned. The top and lock rails have a single tenon while the bottom rail has a double tenon in adittion to the haunches. The dial gauge allowed me to zero in on a perfect haunch and groove fit as can be seen on my set up block at left.
|
|
|
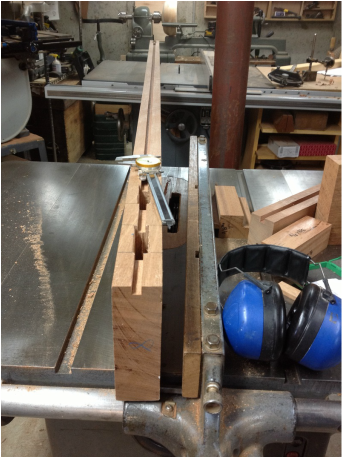
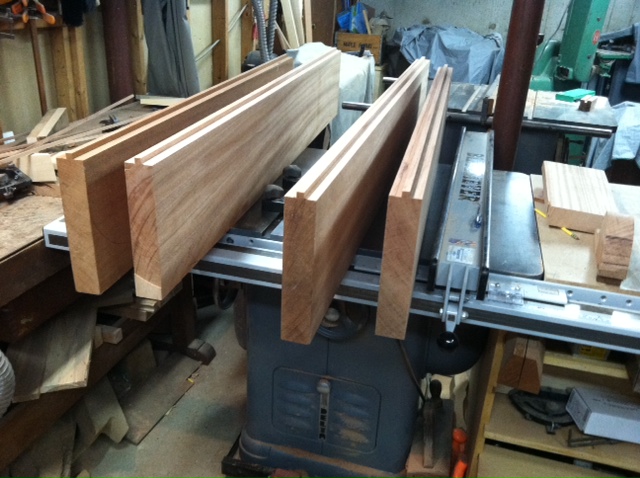
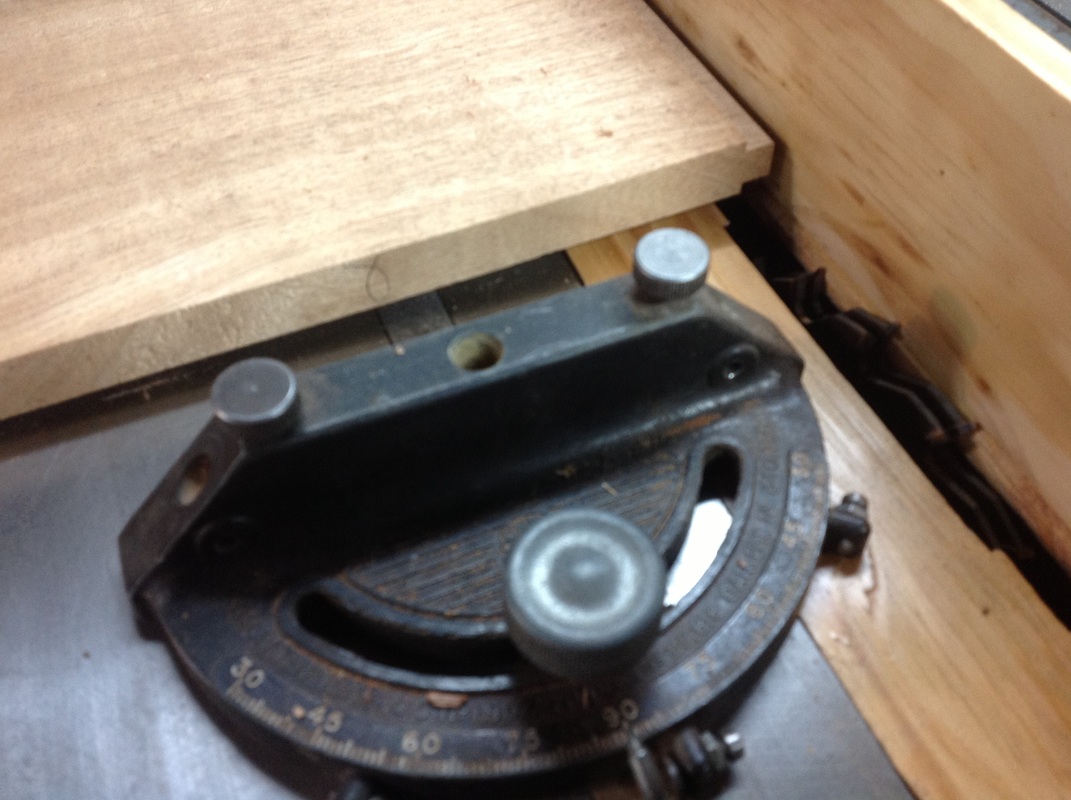
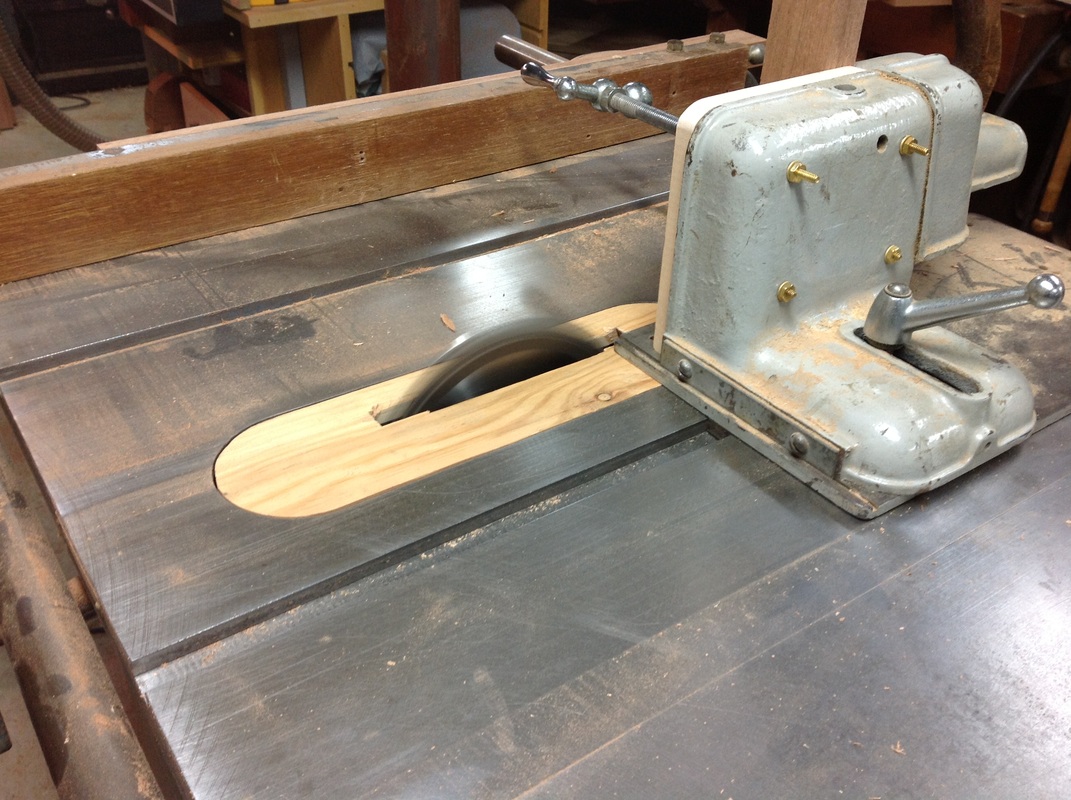
At right you can see I use my second table saw as an outfeed table on long cuts! Shown here is the groove for the double mortised style (the mortise was cut first). Each style was 7 feet long. I use my 1946 Unisaw for dados and my 1952 Unisaw for my outfeed table and cross cuts. Never under estimate the value of two table saws. Set up time is valuable and once I get the right setting I don't like to move it. I can't tell you how much time is saved with two table saws.
|
|
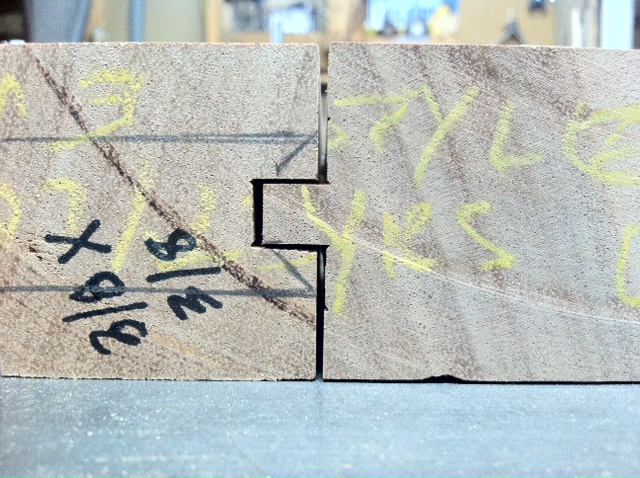
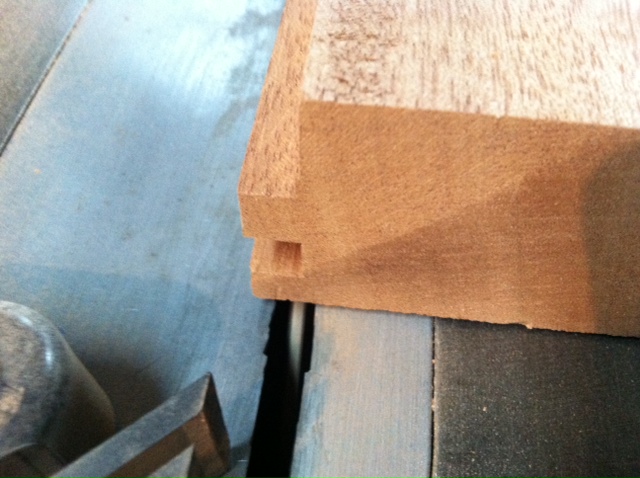
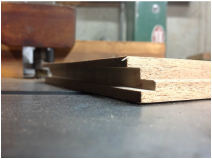
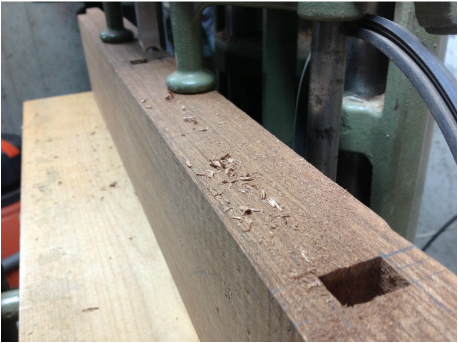
Below I'm cutting the haunch on top of the bottom rail. At left the blade is just sweeping through its final cut. At Center is the haunch on top of the bottom rail which measures .370. The panels will recieve a 3/8ths dado and sit on the haunch. At right are for finished bottom rails waiting to recieve a double tenon and a haunch
|
|
|
Step # 4 : TENNONING TOP, LOCK & BOTTOM RAIL
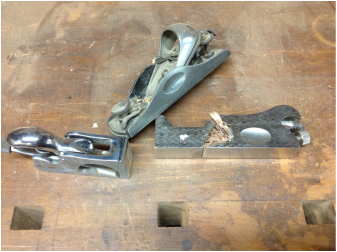
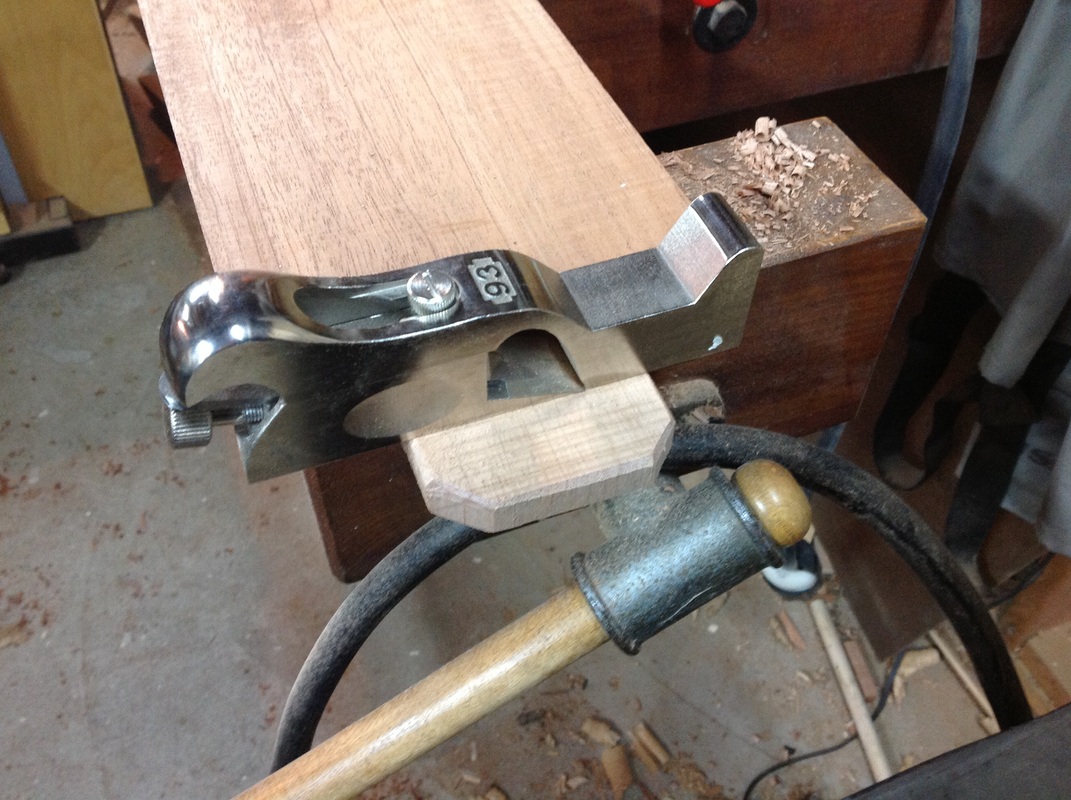
The tools I used are very important. Pictured here are three different planes I used to make any final fit adjustments to each tenons which sits in each mortise. From left to right is a Clifton 770 1 1/8th" Bullnose plane, a Millers Falls hand plane (from 1940) and a newer Stanley No. 93 rabbet plane. They are pictured on my 7 Foot long workbench. I wouldn't want to work with mortise and tenon projecs without them.
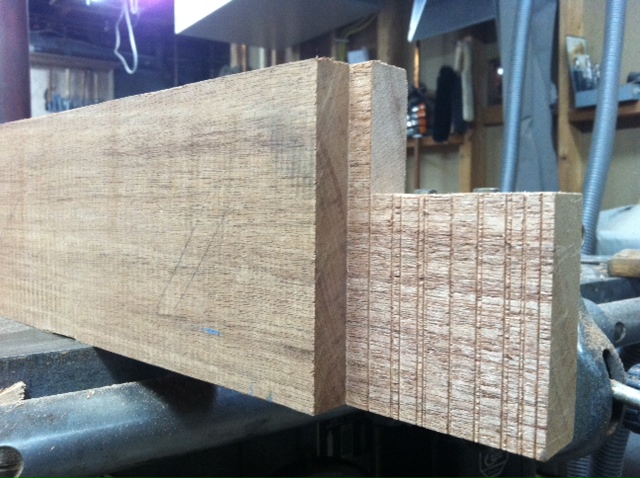
Below are the rough cut tenons and haunches on the top rail (right) and lock rail (left).
|
|
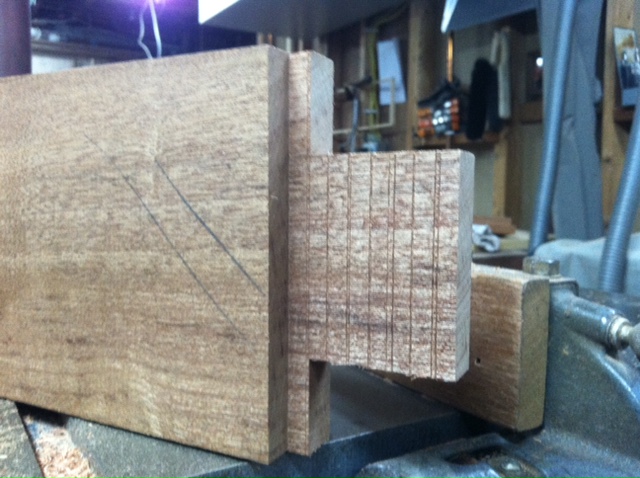
The tenon is being fit with a Stanley 93 dado plane and to the left is the lock rail fitted into the style.
|
|

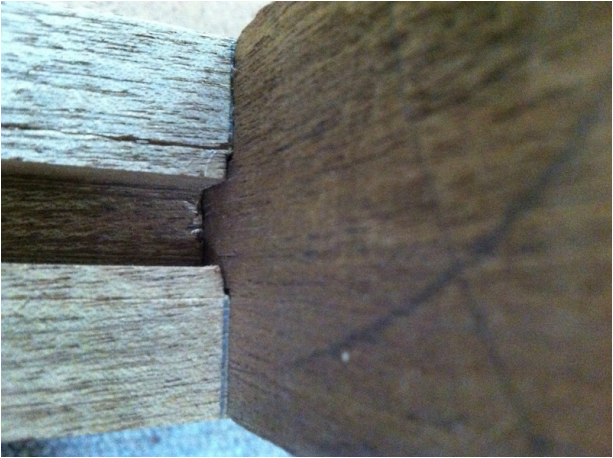
Using a soft rubber mallet, a square and various chisels, I fit the tenons into the mortises and started to see the first glimpses of the actual doors.
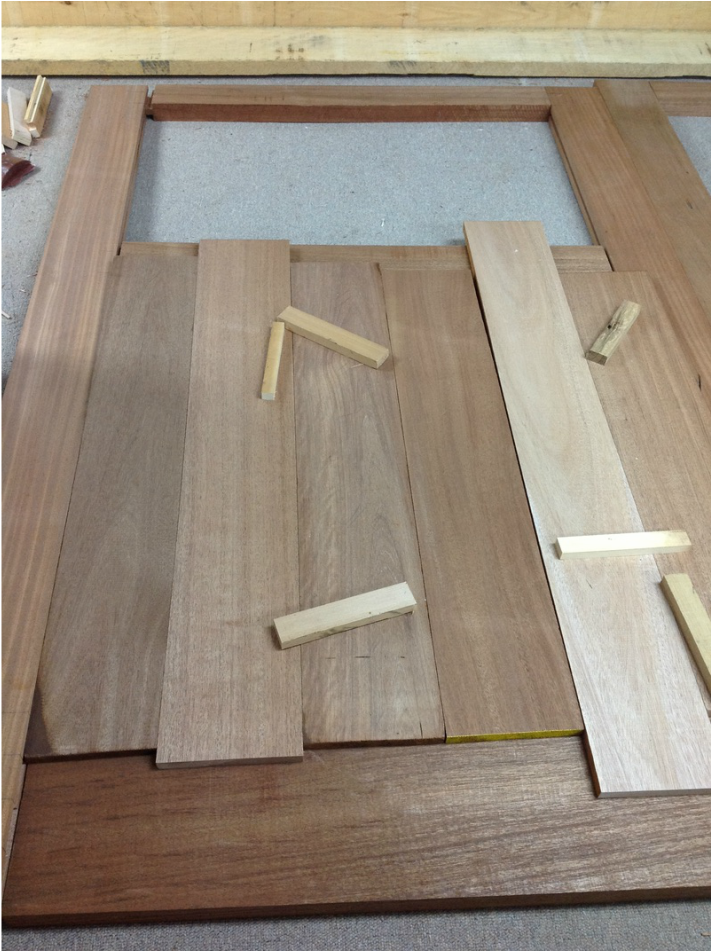
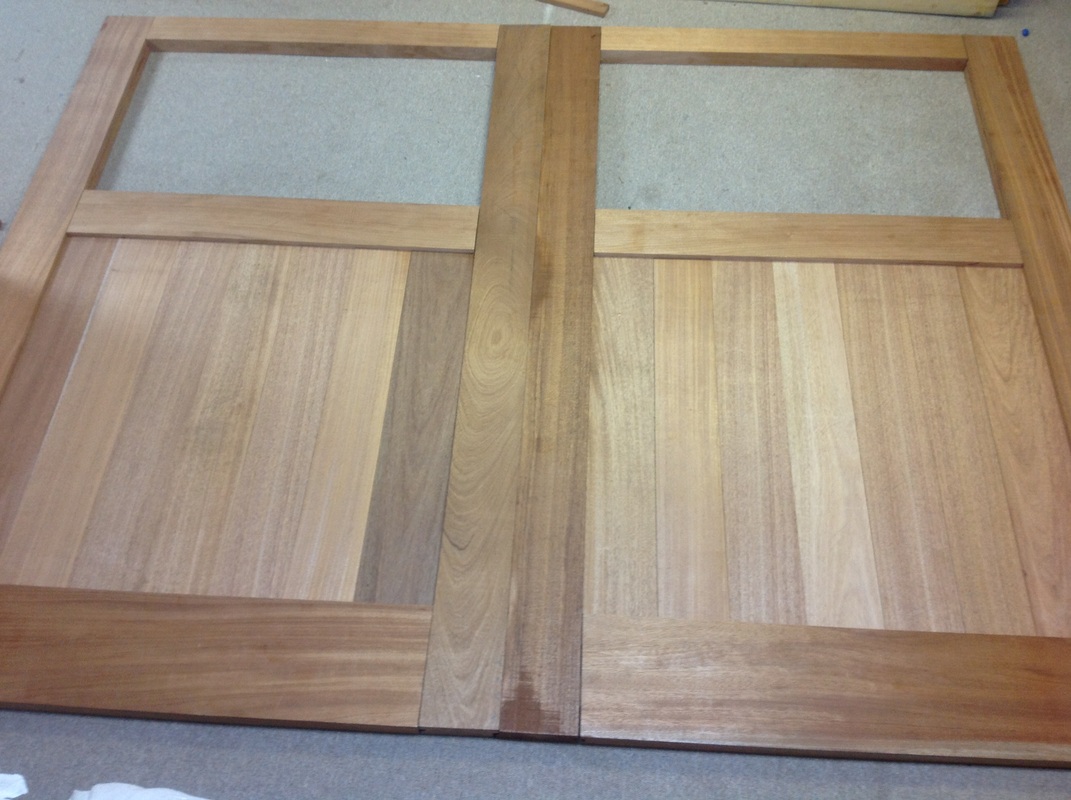
STEP 4: PANEL FITTING

This is a photo of the initial panel fitting. See Sketch # 4 above for dimensions. The photos below show: 1) Loosely laying out the panels; 2) squaring each panel on a table saw cross cut; 3) Cutting a tenon for each panel which fits up into the lock (or mid) rail dado; 4) Using a 1938 Walker Turner shaper to cut a dado in the bottom of each panel to fit into the bottom rail tenon; 5) rabbetting the sides of each panel in a shiplap cut; and and 6) final fitting them in the doors.
The first and last panel also have 3/8ths tenons on one side to fit into 3/8ths dado in the styles (see sketch above). Make sure the panels aren't tight; they need room to expand in the summer.
The first and last panel also have 3/8ths tenons on one side to fit into 3/8ths dado in the styles (see sketch above). Make sure the panels aren't tight; they need room to expand in the summer.
|
|
|
|
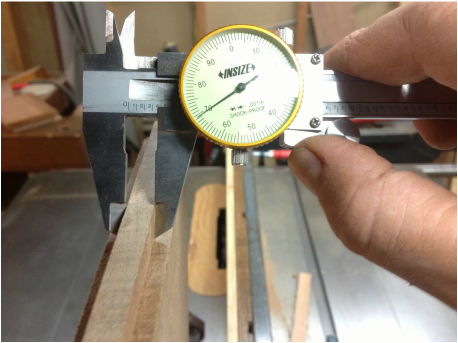
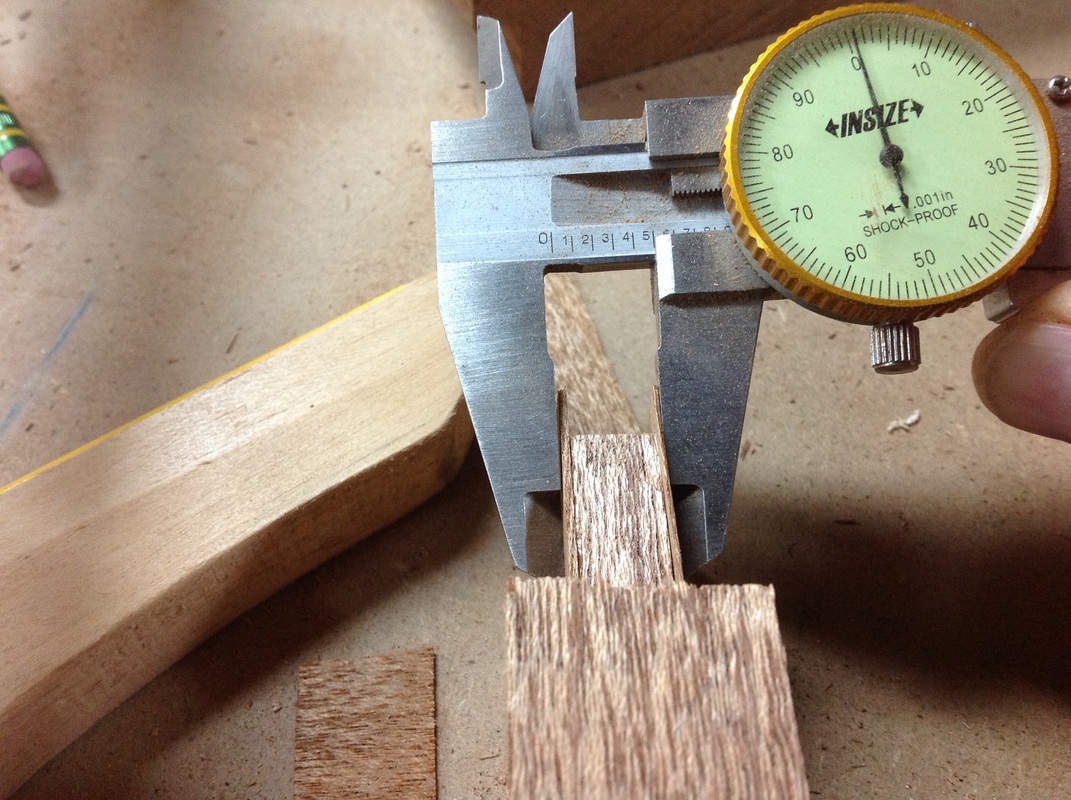
MUNTINS: Here my tenon jig cuts a 1/2" tenon in the muntins. The dial caliper reads 51 thousandths of an inch or one thousandth more than 1/2" :-) I usually use a scrap piece to set up prior to cutting finished stock but check the finished cuts to ensure consitency.
|
|
|
|


